The BlumWay digitizes all the audio tracks from a cassette tape direct to a flash memory card. It automatically creates a separate file for each song.
I had a massive supply of old cassette tapes with music that I wanted to keep, and I decided to convert them to MP3 files.
At first, I considered connecting an old cassette player to the mic input on my computer and downloading software to convert the audio to MP3. But I'm always wary of downloading software that might have viruses or malware.
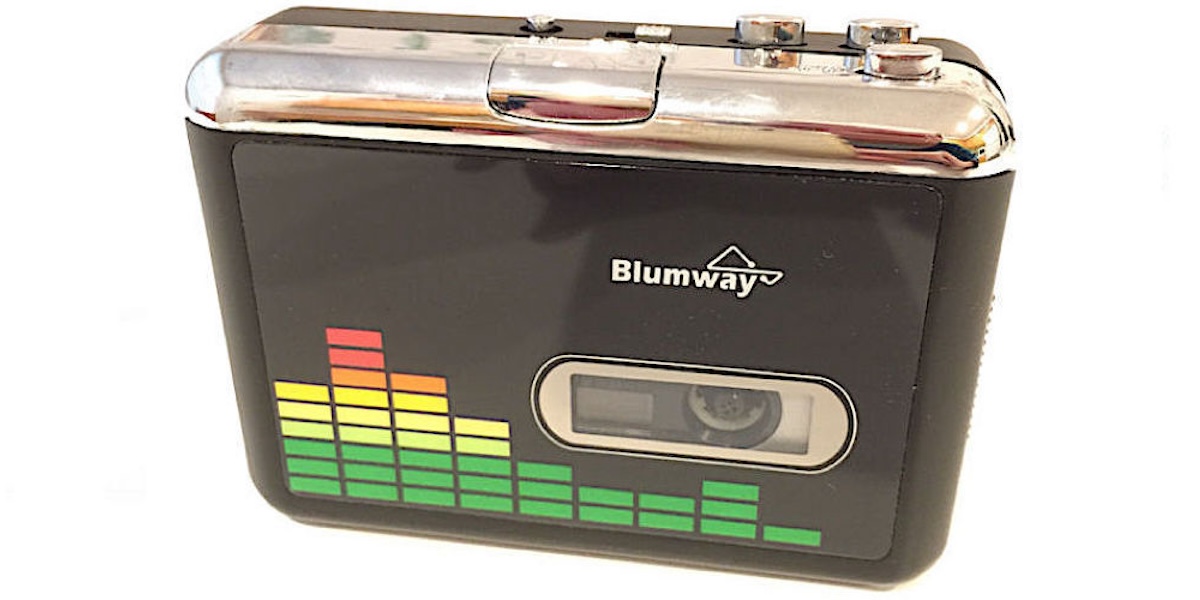
Then I found the BlumWay USB cassette-to-MP3 converter on Amazon. This affordable cassette tape player converts audio recordings to MP3 files and stores them directly to a USB flash drive. It does the conversion directly, so no computer or software is needed.
After the conversion, you can copy the MP3 files to your computer or any MP3 player. You can also burn the files to an audio CD, but you’ll need a laptop or desktop computer for that. I’ll explain that later.
When I got this neat little player in my hands and started using it, I discovered that it’s better than I imagined. It took me a little while to study the user guide and begin creating MP3 files.
I quickly got the hang of it, and I’ll explain everything I learned about using it. So, if you decide to get one for yourself, the information in this article will help. I explain things better than the guide that comes with the unit since I have a background in technical writing.
They kept the cost down by eliminating the following required items that you might already have anyway.
Flash Memory Drive - Not Included
You need to supply your own flash drive. It works with USB 2.0 and 3.0 drives up to 64GB and formatted as FAT, FAT32, or exFAT. I used an older 4GB drive, which holds about 1,000 songs.
Batteries and 5-Volt Adapter - Not Included
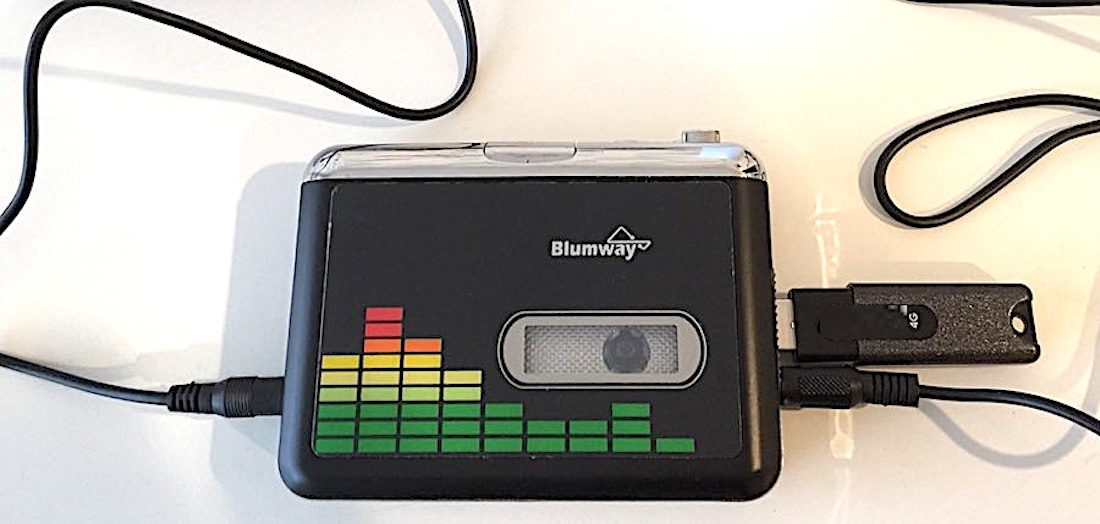
It uses two AA batteries to play tapes. You can also use a 5-volt USB power adapter or plug it into a USB port on your computer. The cable (shown in the image below) is included, but the batteries and 5-volt adapter are not.
The AA batteries are fine for playing tapes, but I discovered that conversion to MP3 and writing the files to the flash drive requires more power. You can use a USB power adapter/charger such as the one you use for your smartphone.
I guess they eliminated a speaker to keep the cost down, too. But the unit does include stereo earbuds to monitor while digitizing.
You can also use the player to listen to the MP3 files on your flash drive. An audio cable is also included in case you want to connect another audio device to the 3.5mm AUX jack. I had a little speaker that I used instead of the earbuds, but that was just my preference.
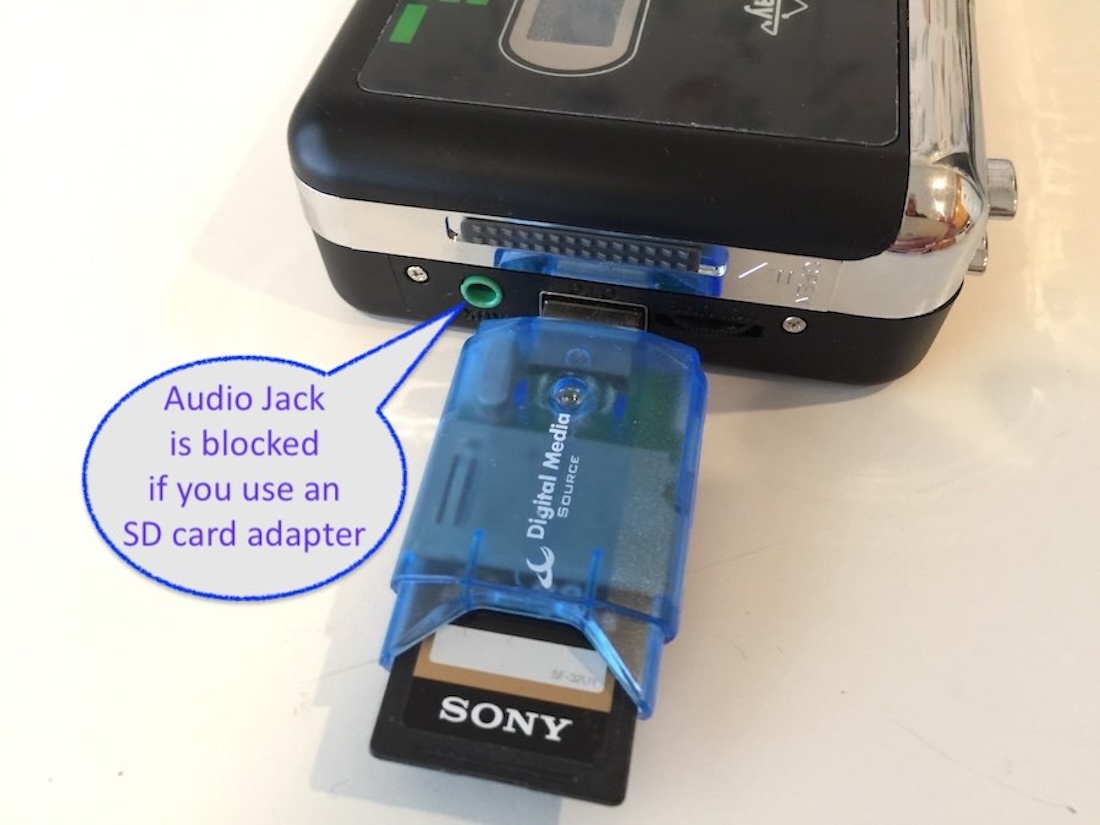
One thing worth noting: I discovered that if you use an SD card adapter, it’s too wide, and it blocks the AUX audio jack, as shown below. You need to use a stick-type flash drive, as shown in the two earlier images above.
I like the fact that it doesn’t need to be connected to a computer. It does all the work itself and saves the converted MP3 files to the USB flash drive.
It does a tremendous job of converting audio to MP3. And it makes the task so easy. I got through converting close to 100 tapes with no problem.
It automatically creates a directory called TAPEMP3 where it stores the MP3 files. The filenames go from FV0001.MP3 through FV9999.MP3. If you delete the files after copying to another device, it starts over again with FV0001.
I loved how I could walk away and let it handle the difficult tasks. You can set it to "automatic" mode, which detects the silence between songs on a tape and starts a new file for each song. I’ll explain how manual and automatic mode works below.
You can also set it to reverse automatically at the end of one side and continue converting music from side two without needing to flip the tape over.
The unit has a switch to select playing just one side and stop, or automatically reverse and play the other side. The tape runs backward while playing side 2, so it ends up fully rewound when it's done with both sides. There’s no need to rewind it in that case.
When digitizing, it will capture all music from both sides if you select the option to play both sides.
I discovered a strange oddity. The function of the FF and REW buttons is transposed when the tape is playing the other side without physically reversing the tape.
That logically makes sense, but it is confusing. It took me a while to get used to it and to remember to press FF to rewind the tape while playing the reverse side backward. Got that?
I noticed some people left comments on Amazon saying the unit doesn't have a rewind option, only fast forward. I found that both buttons work fine. I think people just got confused because of the flipped functionality of the forward and reverse buttons when playing the other side, as I just discussed.

I love this feature. When recording, the unit can automatically split each song on a tape into individual MP3 files. It detects the silence between music selections and starts a new file.
I only ran into trouble with the unit's ability to properly detect silence between a couple of songs that had a long pause. It reacted to the silence within the music as if it were the end of the song, and it split it into two files.
It was an easy fix. All I had to do was digitize that song in manual mode. When recording in manual mode, you need to listen while recording, so that you know where to start and stop the recording while the tape is running.
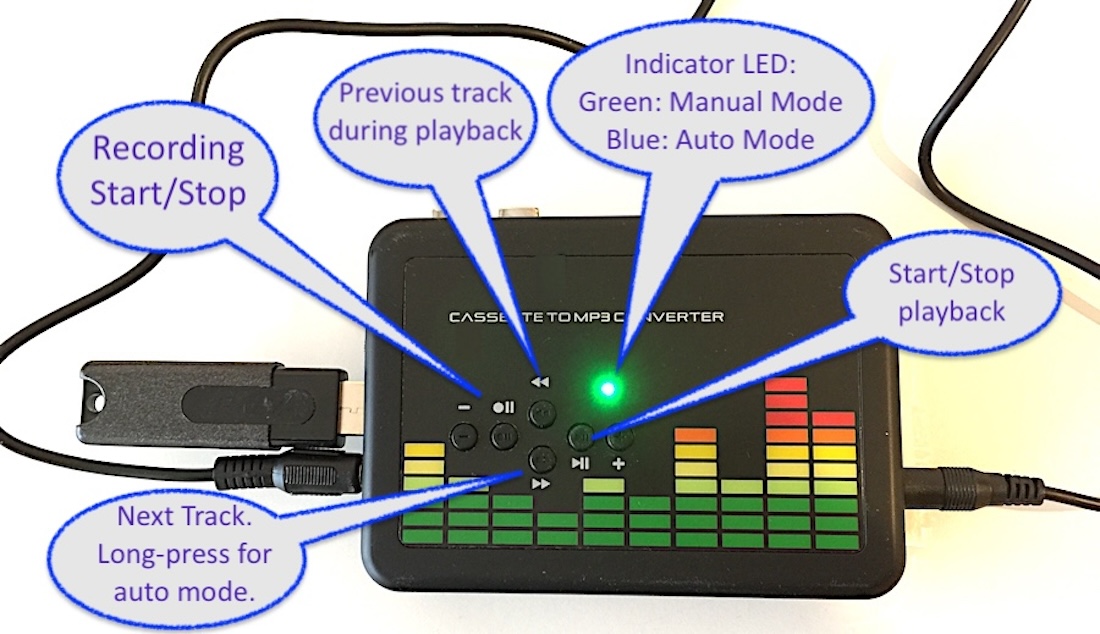
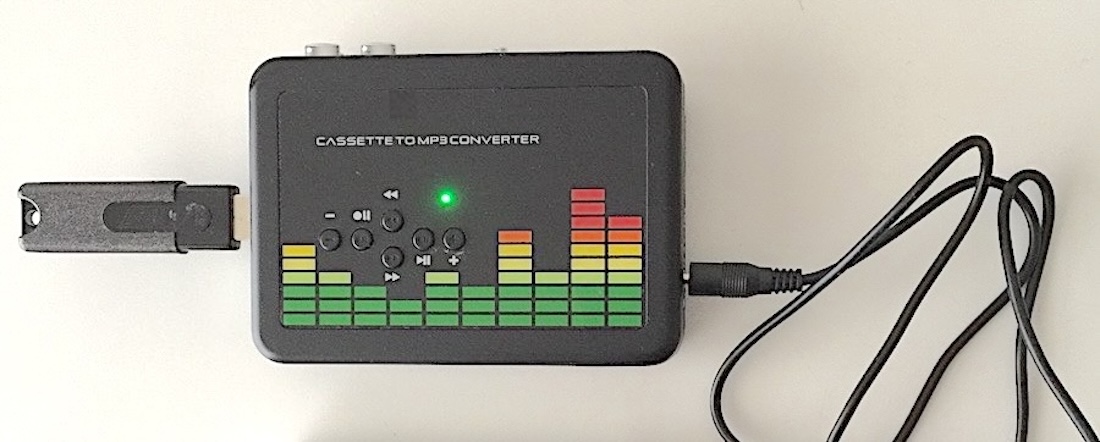
Refer to the image above as you read this section.
You need to plug the flash drive into the USB port before digitizing a tape. A green LED light will indicate that it’s ready and is in manual mode by default.
The digitizing feature is separate from the physical playback of a tape. That’s a powerful feature that I consider to be proper planning during the development of this unit. It makes it very easy to get things right. I’ll explain what I mean.
The “PLAY” button starts the tape. Then you control the digitizing process with the control buttons while the tape is playing. You need to flip the unit over because the control buttons are all on the back.
When I want to digitize a tape, I place it in the unit, and I press the play button. Then, before the first selection, I press the “Recording Start/Stop” button on the back of the unit. See the image above. I added the text bubbles to that image to make it clear what's what.
It starts in manual mode, and I can start and stop the recording at any time while the tape continues to play. So between each song, I quick-press the “Next Track” button, and the unit starts recording a new MP3 file.
If I want to walk away and let it digitize the entire tape automatically with separate files for each song, I switch it to automatic mode before the first song starts playing.
I do that by pressing the “Next Track” button, and I keep pressing it for three seconds until the green LED light turns blue. That indicates that it’s in automatic mode.
Once in automatic mode, I can leave it alone. It will create individual MP3 files for each song, including all songs on side two of the tape. I was delighted with how well that had worked. Both sides of the cassette, all digitized without any hassle!
When I first tested it, I watched the blinking blue light while it recorded a song. When it got to the end where there was silence, I saw that the blue light stopped blinking momentarily. Then it started blinking again when the next song began playing. That proved to me that it detected the silence and started a new MP3 file.
Later, when I stuck the USB flash drive into my Mac to check it out, I saw that all the files were created correctly.
You don’t need to press the “Recording Start/Stop” button between songs while digitizing an entire tape in manual mode. Just quick-press the “Next” button, as I mentioned earlier. That will quickly start recording a new MP3 file without missing the start of the next track.
The additional buttons for "Previous Track" and "Next Track" are used to control playback if you want to play music you already have on a flash drive. The “+” and “-” buttons control the volume on playback.
The "Next Track" button can be used to change modes from manual to auto by holding it for a few seconds until the LED turns blue. I'm repeating that because it took me a while to get used to that myself. So it's worth repeating.
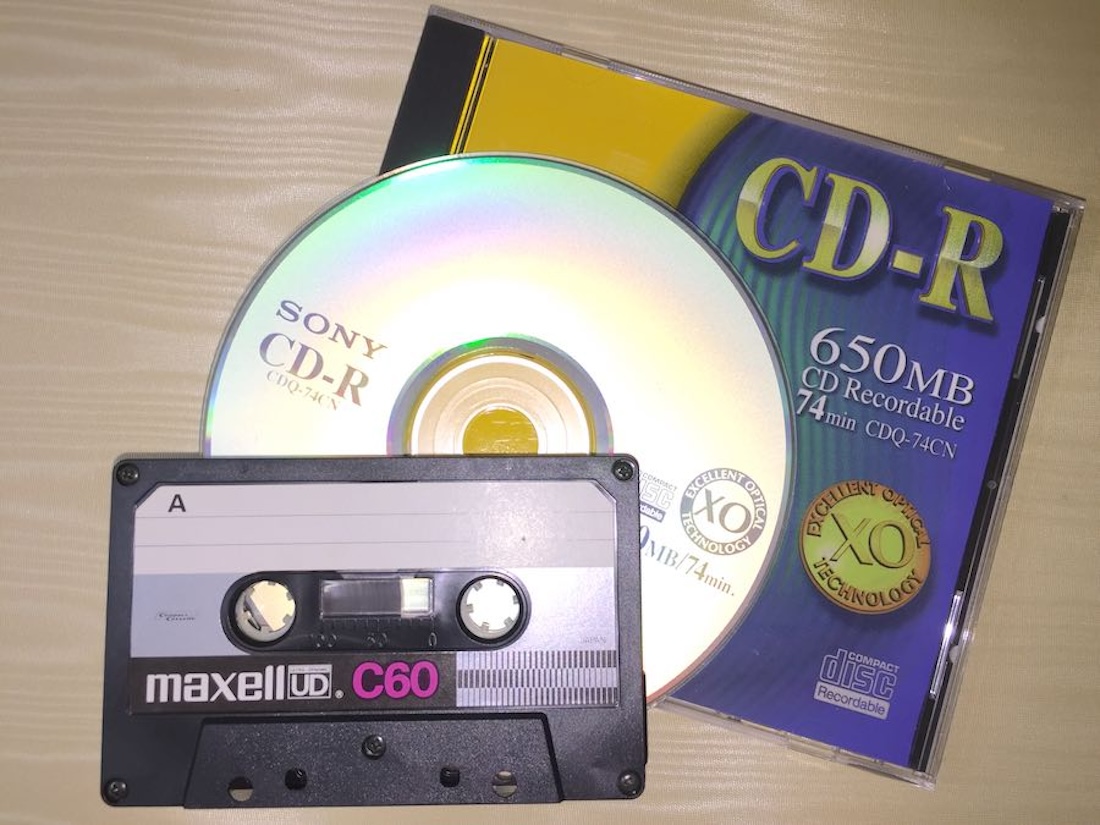
Burning CDs is not a function of the BlumWay converter. If you want to create an audio CD from the MP3 files, you will need to do it on your computer with a writable CD/DVD drive and the proper software to burn a CD.
Just use a recordable CD (CD-R). Don’t use a rewritable CD (CD-RW) because they may not work with older CD players.
You can copy the files on the flash drive anywhere. After I converted some tapes, I connected the flash drive to my Mac to copy the files to my hard drive. You can do that with a PC too. Both Apple iOS and Microsoft Windows recognize MP3 files.
As I mentioned earlier, the files are saved on the flash drive in a directory called TAPEMP3, and all the files are named FV0001.MP3 through FV9999.MP3. Remember, it starts over again with FV0001 if you delete the files on the flash drive.
I renamed the files to the artist and song names on my Mac, but that’s not necessary. I just did it for my personal reference. From there, I burned them onto a CD that I could play in my car. A 650MB recordable CD (CD-R) can hold about 74 minutes of music.
CD players in most vehicles these days can play MP3 files, so instead of burning audio CDs, you can create MP3 data CDs. The BlumWay Converter creates high-quality 128 Kbps compressed MP3 files. So you can fit about 200 songs on a single 650MB CD-R disc if you format it as an MP3 CD.
You can find free MP3 CD burning software with a Google search. Microsoft recommends Express Burn, a free burner for Windows that creates audio discs or MP3 discs, as well as DVDs. 1
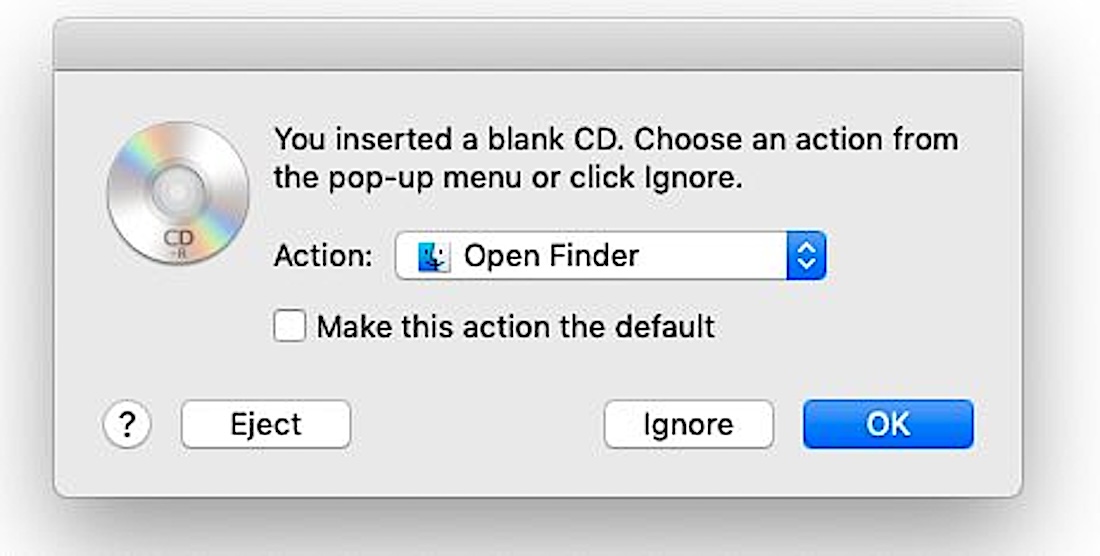
You already have a CD burning capability on your computer if you have an Apple Mac. The Music app on macOS Catalina and higher, and iTunes on prior Mac OS, can burn a playlist to an audio CD or MP3 CD. 2
Copying the MP3 files to an MP3 player is even more straightforward. Just connect your MP3 player to a USB port on your computer and the flash drive containing the files to another USB port. Then just drag and drop the files with your mouse.
I found the BlumWay USB Cassette to MP3 Converter on Amazon ![]() and discovered you can select free shipping even if you don’t have Amazon Prime.
and discovered you can select free shipping even if you don’t have Amazon Prime.
I digitized my old tapes to burn to audio CDs, and I ended up buying another converter for a friend’s birthday. She had a lot of cassette tapes too, and she always said she wanted to listen to the songs on her MP3 player.
No matter what you decide to do with your converted music, you’ll have endless enjoyment now that you can hear those songs from the past again, in any modern player.
Was this meaningful to you? Tap