Discover how to safely remove impacted earwax that worked for me using an over-the-counter earwax softener. I describe every step of my experience so you'll know what to do.
I always thought I was doing the right thing, carefully drying my ears with cotton swabs after taking a shower. I was always careful to avoid going in too far with the swabs. I knew not to touch the eardrum. I've done this all my adult life.
However, I suddenly had a problem in my mid-60s with impacted earwax in my left ear. Evidently, I was pushing the wax deeper and deeper over time.
According to the Mayo Clinic, using cotton swabs or other items to clean one's ears may remove some wax, but it actually pushes more wax into the ear canal even deeper.1
The chemical name for earwax is cerumen. It has a definite purpose. It helps protect us by keeping foreign bodies and outside contaminants, such as dust and insects, from entering the ear canal.
Dust and pollen will get caught in the wax and not go deep into the ear canal, which could damage the eardrum. The wax can also prevent the ability for bugs to crawl into your ear. Think of it as flypaper.
While researching this matter, I learned that moving your jaw while talking—and chewing while eating—will help push the wax outward.
In addition, the ear canal has tiny hairs that vibrate to move the wax outward. It's a natural function of the body to move the wax out, like on a slow-motion conveyor belt.2
I realize now that the best thing is to let the body handle wax removal naturally.
I suddenly lost quite a bit of hearing in my left ear one day. It started right after I took a shower, so I already thought it was an earwax problem and didn't panic. Nevertheless, I had my doctor check it out just to be sure I was right.
My doctor looked in my ear with an otoscope (ear scope) and was able to rule out any serious conditions. That is important to confirm before attempting to resolve the problem on your own.
He told me to use an over-the-counter earwax softener, and if that doesn't work in a week, I should see an ENT doctor. In severe cases, a specialist has the proper instruments to remove impacted earwax manually.
I was able to resolve the problem with the earwax softener at home, but it took a lot of patience and repeated softening and irrigation sessions, as I'll explain.
The process is first to soften the wax that's impacted. The safest method is with an earwax softener. This is supplied OTC in a dropper bottle that can be used to place the required amount of fluid in the canal (usually 5 to 10 drops).
Some people say you can use hydrogen peroxide to soften the wax, but it's better to use an earwax softener that has 6.5% Carbamide Peroxide, which is the proper chemical approved for this purpose.
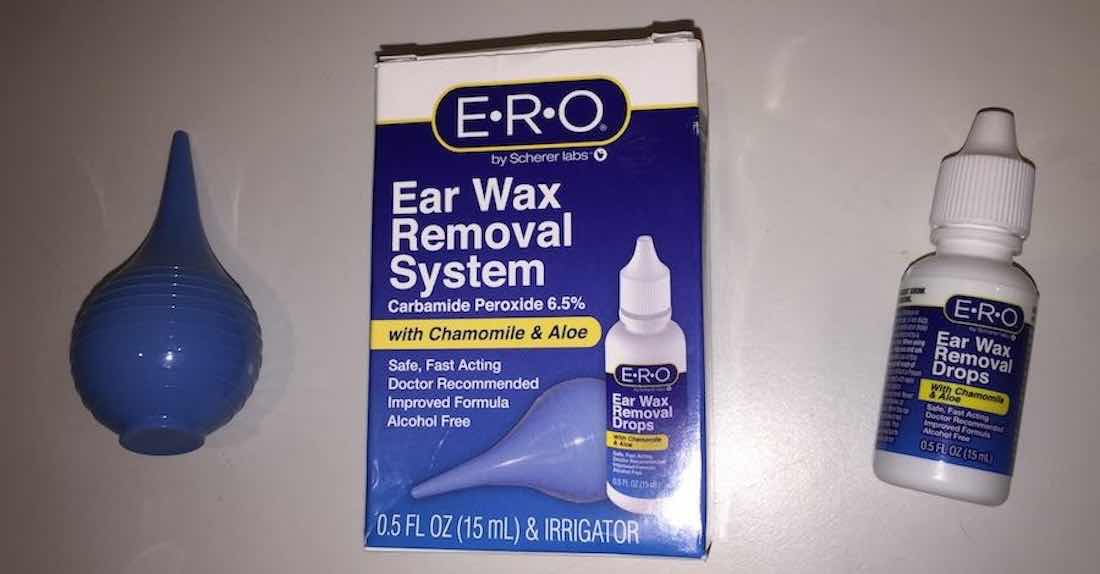
With a little research, I found the E-R-O Earwax Removal Kit. It includes a syringe that's required to irrigate the canal after using the softener. It's available from Amazon and also sold at Walmart.
When shopping around, look at the label and compare products. Any one with 6.5% Carbamide Peroxide as the main ingredient should work just as well. And don't just buy the earwax softener. Make sure you buy a kit that includes the rubber bulb syringe.

The instructions say to tilt your head sideways and place 5 to 10 drops of softener into the ear with the dropper. Then after several minutes, flush with warm water using the bulb syringe. Even the Mayo Clinic website says to do it that way.2
That didn't work for me, so I made several improvements to this process.
First of all, it takes almost an hour. Yes, I lay in bed with my ear up for well over 45 minutes after putting in ten drops. I found the more, the better—as long as you don't overflow the canal and make a mess.
I could feel it fizzing all that time, so I knew it was still working even after half an hour. That fizzing means that the ingredient is activating and breaking down the wax.
I had a book with me to spend the time reading. Another time I used my iPad, so I could watch a video to pass the time. The important thing is to keep your ear facing up all that time while you feel the fizzing action. It's actually a good feeling, knowing that it's working.
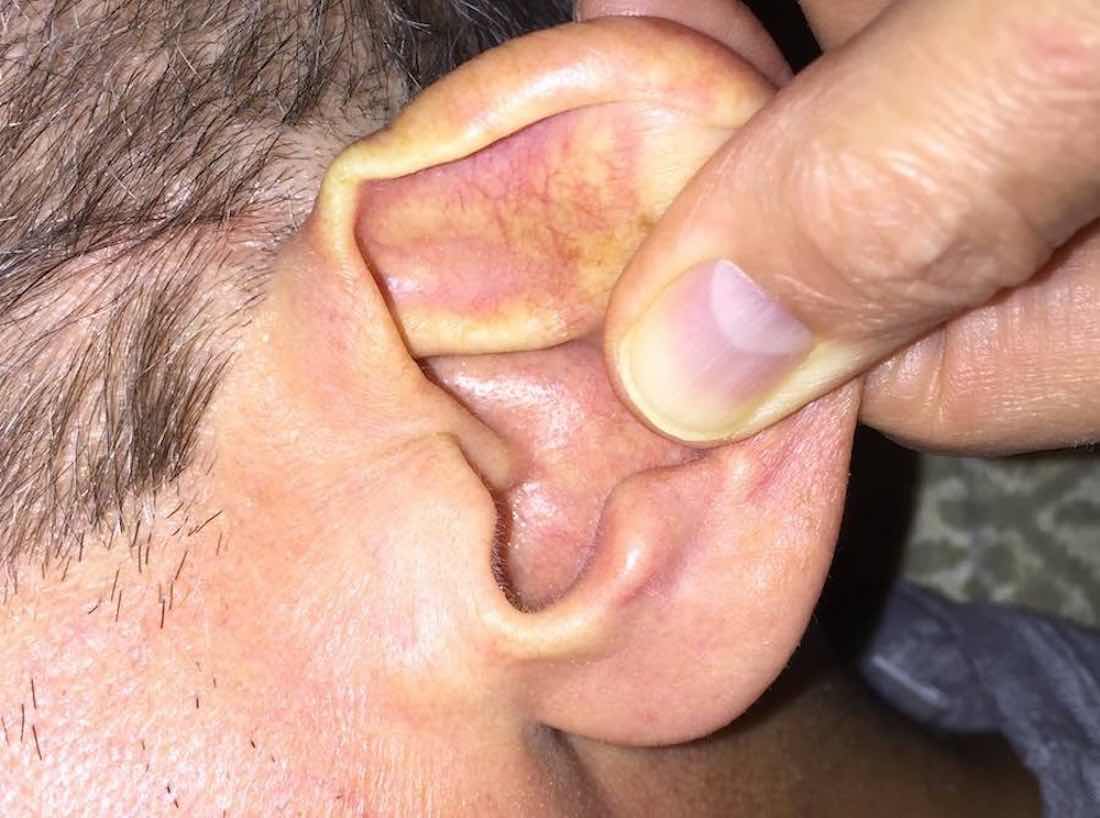
Now, this is important: I pulled my earlobe in all directions a few times during the session, as shown below. I could tell that I was helping the softener work its way around and loosen more wax.

After each session of letting the wax softener fizzle in my ear for an hour, I tilted my head the other way, using a tissue to catch the softener fluid and some wax as it drained out.
I discovered that more wax comes out by irrigating with warm water. That's why it's important to get a kit that includes the rubber bulb syringe to flush the ear.
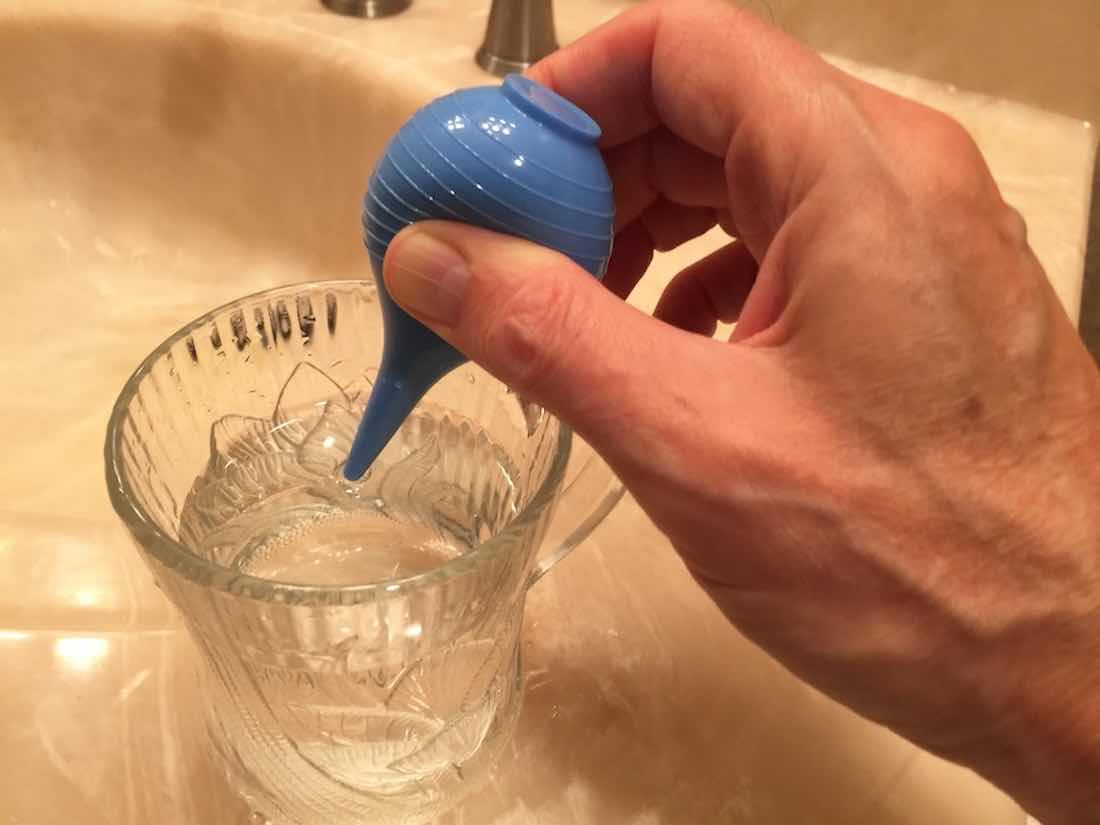
I filled a teacup with warm water and sucked the water into the syringe, as shown below. The water should only be body temperature. Water that is too warm or too cold can cause dizziness or loss of balance.

I also had to improve on the method described in the instructions on the box. They tell you to gently flush the ear with warm water after letting the softener drain out, but they don't explain how to do it the right way.
At first, I made the mistake of using the syringe to fill my ear with warm water and then turn my ear down to let the water drain out. That was wrong! No one tells you this.
The best way to use the syringe is to pump the water into the ear while facing the ear down over the sink. Quickly squeezing the bulb syringe forces the water up.
I discovered that more wax comes out when flushing upward and letting it immediately drain out. It's a little messy, but more impacted wax is removed that way.
I did that several times until I used up all the warm water in the teacup. Then I dried my ear with a towel, but never again will I use a cotton stick.
Every day for four days, I repeated the session of fizzing and irrigating. Each day I felt some improvement.
On the fourth day, I was feeling much better and realized I could hear through my left ear again, but not very well. I continued with another session using the softener and flushing my ear.
After 45 minutes of lying on my bed with my ear up to the ceiling, I turned to let it drain into a tissue and then went over the bathroom sink to irrigate my ear a few times with warm water—with my ear facing down and shooting upwards with the syringe bulb, as usual.
Suddenly a huge dark bit of wax fell into the sink when the water drained. I was amazed by the looks of it. "That thing was in my ear?" I thought to myself.
My hearing was completely normal after that!